Celebrity Fitness: Great Yoga Poses For Women by Celebrities

Yoga is an incredible form of exercise – it’s a great way to increase your strength and flexibility while burning calories. It also has excellent benefits for your mental health, and in particular, is very effective at reducing stress levels. If you’re just getting started with yoga, learning some of the key poses is a great way to familiarize yourself with the practice before putting together an entire flow. Here are some of the best yoga poses for women and how to do them.
Tree Pose
This is one of the best poses for developing your balance. Start in mountain pose, and then take your right foot and bring it to your left inner thigh. Keep your knee turned out and your heel pointing up towards your hips. Keep your standing foot straight, resisting the urge to turn in or out.
 instagram/emmaroberts
Lift your hands to prayer position, and then engage your core to maintain your balance. If you’re struggling to balance, try focusing on a fixed point in the room. Once you’ve found your balance and held the pose on one side, repeat the process on the other side.
Wheel Pose
This pose is one of the deepest backbends in yoga, and it’s not for the faint of heart. However, if you have the flexibility to do it, it’s a great way to strengthen and stretch at the same time. Start by lying on the floor, and then bend your knees, so your feet are flat on the floor, bringing them close to your tailbone. Then, put your hands on the floor beside your head with your elbows pointing up and your fingers pointing towards your shoulders.
 instagram/mirandakerr
Make sure you’re stable and push your hips up into the air, so your body makes an arc. You’ll need to balance your weight evenly between your hands and feet. You should also make sure you engage your inner thighs by turning them slightly inward. You can let your head hang gently or look at the floor if you choose.
Downward Facing Dog
This pose is a building block for an entire yoga flow practice. It stretches the backs of the legs and the arms while strengthening the shoulders. To do this pose, start on your hands and knees in a tabletop position, and then press your hips up into the air, so your arms and legs are straight.
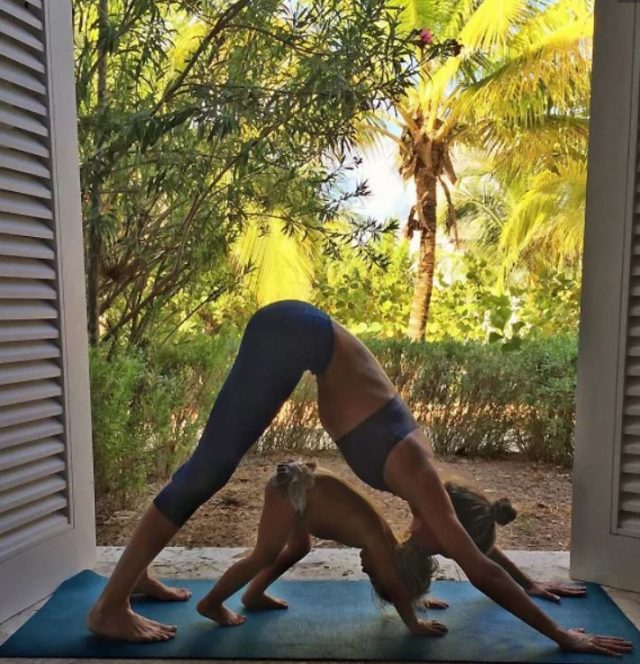 instagram/Gisele
Your body will be making a triangle shape, and you should focus on keeping your arms and legs as long as possible. It may help to think of pressing the hands and feet into the floor to create a secure base. Keep your head between your arms facing your legs, and try to keep your shoulders down instead of letting them crawl up towards your ears.
Upward Facing Dog
Staying with the vinyasa flow, this is the next pose that happens after your low plank. From low plank, you’ll push up through your arms, so your elbows are straight, letting your hips drop down to the floor. Your back will have a slight arch, and you’ll lift your head to complete the line.
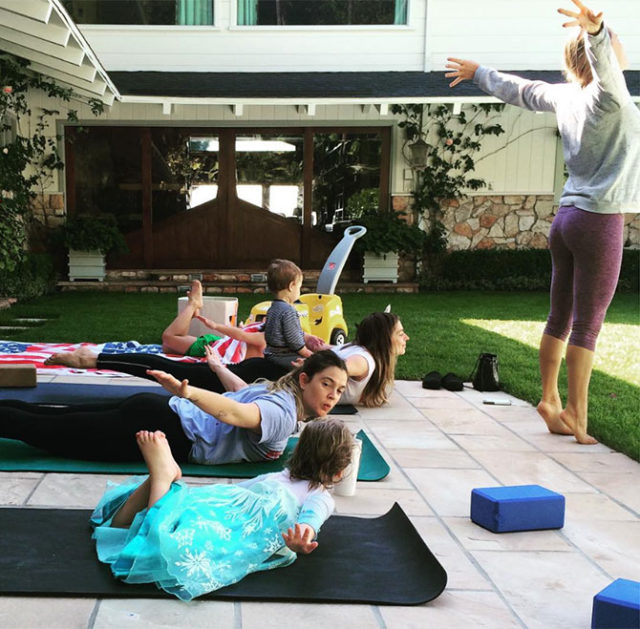 Barrymore/Instagram
Flip your toes over, so they are touching the ground. Engage your core and pull your shoulders back to generate energy in the torso.
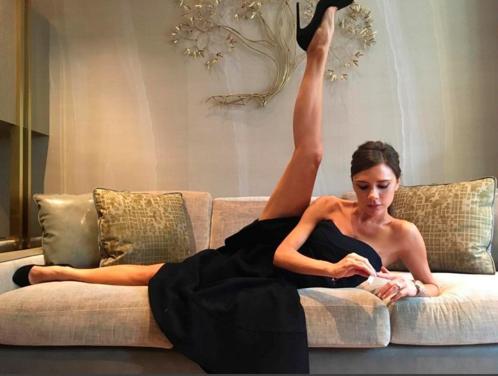
Standing Splits
Standing splits are somewhat similar to half moon pose and offer many of the same ankle strengthening benefits. However, your torso and hips are in a very different position during this pose. Start in mountain pose, and then come into a forward fold with your hands on the floor.
instagram/victoriaBeckham Shift your weight into your right foot and lift your left foot into the air, keeping the toes pointing towards the ground and your hips square. This means you may not be able to lift your leg as high as you would with your hips open, and that’s okay. Deepen the stretch by pulling your torso closer to your right leg, and grab onto your leg with one hand for a deeper balance.
Crow Pose
Crow pose is one of the first arm balances and inversions that many people learn in yoga. Start in mountain pose, and then slowly start to squat, keeping your hands on the outsides of your feet. Stretch your arms slightly forward and begin to bend your elbows, touching your shins to your upper arms.
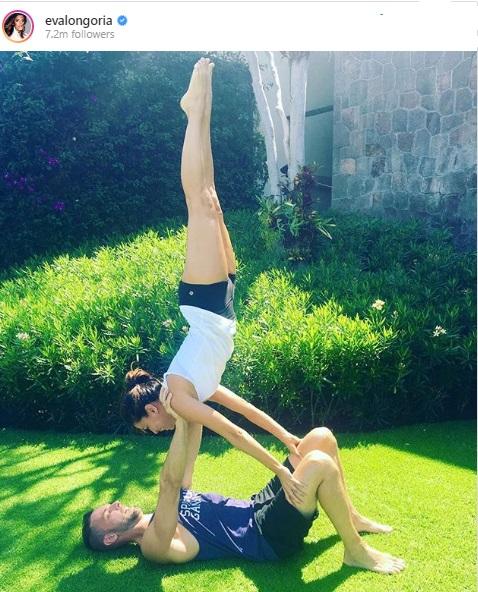 instagram/evalongoria
Think about moving your knees into your armpits, and begin to lift your heels off the floor. At this point, start shifting your weight into your hands, and continue to press your knees and shins into your upper arms until you can lift the balls of your feet off of the floor.
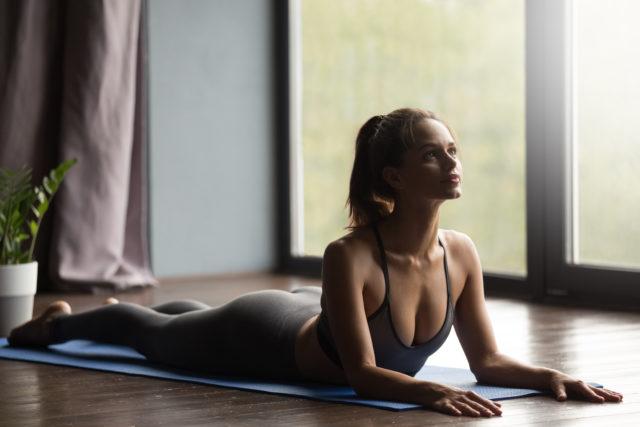
Sphinx Pose
This pose is often thought of as a predecessor to upward facing dog, but it is great for strengthening the upper back on its own. Start by lying on your stomach with your legs straight out behind you. Think about lengthening through the tailbone and the front of the hips.

Set up for the pose by placing your elbows under your shoulders with your forearms directly out in front of you. Push your torso and head up, creating a bend through your upper back. Breathe deeply and settle into the pose.
Warrior I
This pose is the first in the foundational warrior series. It’s not quite as commonly used as warrior II, but it’s still important to know before you head into any yoga class. Step one foot to the front of the mat so that your legs are almost mat distance apart. Bend your front leg so that you are in a lunge with your thigh parallel to the floor.
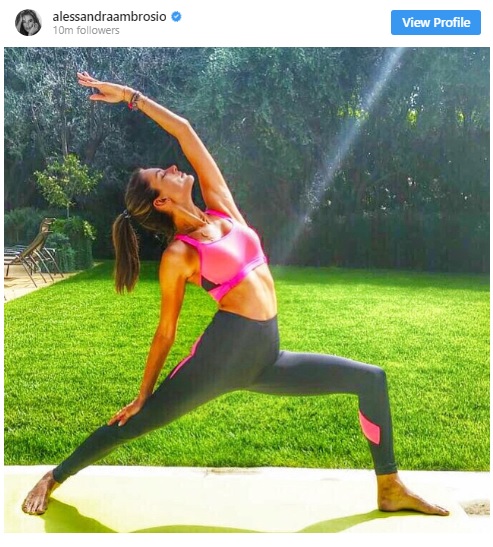 instagram/alessandraambrosio
Keep your front foot turned out slightly while turning your back foot out 90 degrees to face the side of the room. Reach your arms up by your ears, so they are pointing towards the ceiling. Be careful to keep your shoulders down and your shoulder blades pulling towards each other. Engage your core for balance and look up towards the ceiling.
Warrior II
This is one of the most utilized warrior poses, and it’s a must-know before you head into any yoga class. Step one foot forward, so your feet are almost mat distance apart. Your forward foot should be pointing towards the front of the room, and your back foot should be turned out, so your toes point to the side of the room.
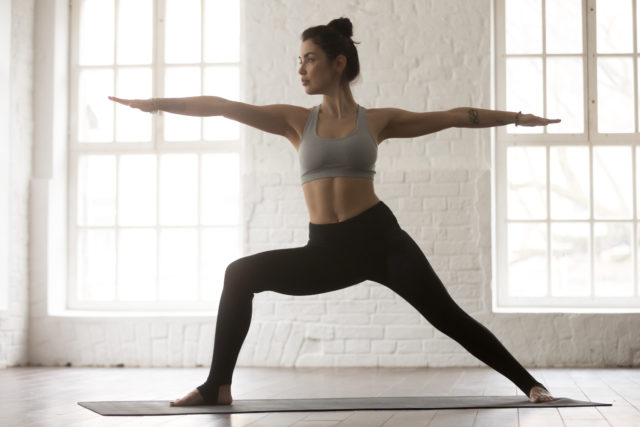 shutterstock
Bend your front knee so that you are lunging, with your leg making a 90-degree angle. Twist your torso towards your back foot, so that your back hip is open and your chest is facing the side of the room. Extend your arms out in a straight line, so one is in front of you, and one is behind you.
Warrior III
This is the final pose in the warrior sequence. It is a balance pose that requires considerable strength and coordination. Start in a high lunge or crescent lunge position. Then, move your torso forward, so it is parallel to the top of your thigh. Be careful to keep your back flat as you make this transition, and keep your arms stretched forward, so they are parallel to the floor.
 instagram/Elle Goulding
Straighten your front leg slightly as you lift the back leg off the floor, bringing it in line with your torso. If your legs are hyperextended, you may need to keep a slight bend in the front of your knee for more control. Think of energy releasing out through your foot and your hands outstretched in front of you and ground through your foot for stability.
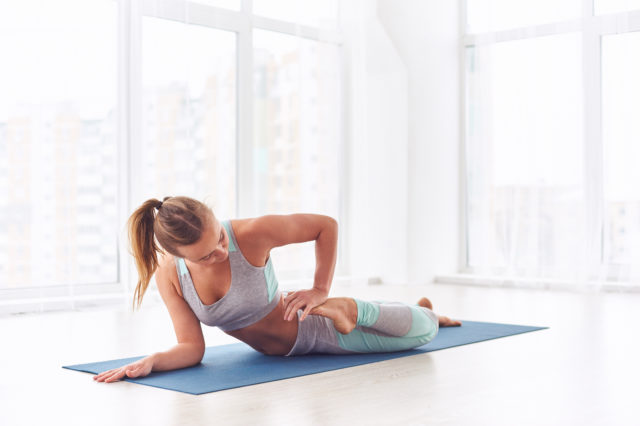
Side Plank Pose
This pose is one of the most effective for developing upper body strength. Start in a traditional plank and shift your weight to the outside of the right foot, and then stack the left foot on top.
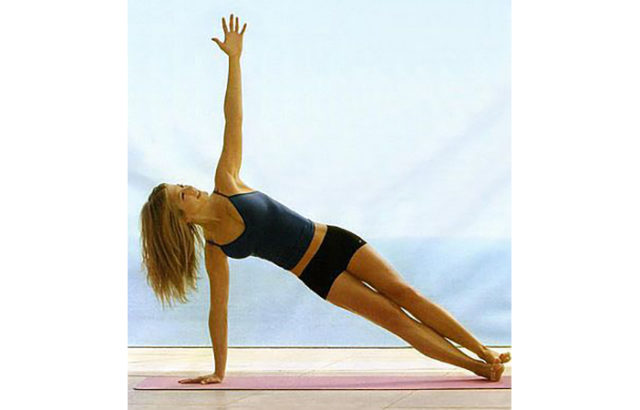
Then, shift your weight into your right hand and lift your left arm towards the sky. Open your body to create a diagonal line, being careful not to let the hips drop.
Dolphin Pose
Dolphin pose is somewhat similar to a downward facing dog in that the hips are lifted and the legs are straight, creating a triangle shape. However, in the dolphin pose, the weight rests onto the forearms instead of the hands. This provides a deeper stretch through the shoulders and upper back while strengthening the entire body.
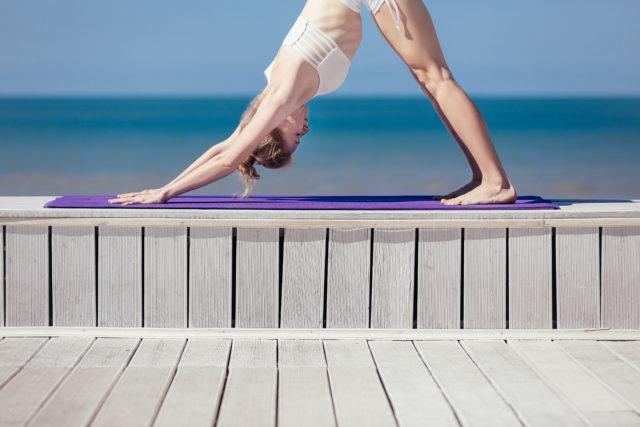 shutterstock
To get into the pose, start on your forearms and knees, with your palms clasped together and the front of your arms pressing into the floor. Push your hips up the same way you would get into a downward-facing dog. If your back starts to curve, keep your knees slightly bent for more stability.
Dancer Pose
This pose is a fun and challenging balance that will also test your flexibility. Start by standing in mountain pose, and shift your weight onto your left foot, bending your right foot up behind you towards your tailbone. Reach back with your right hand and grab the outside of your right foot. Then, start to lift your right foot up and back, away from your torso.
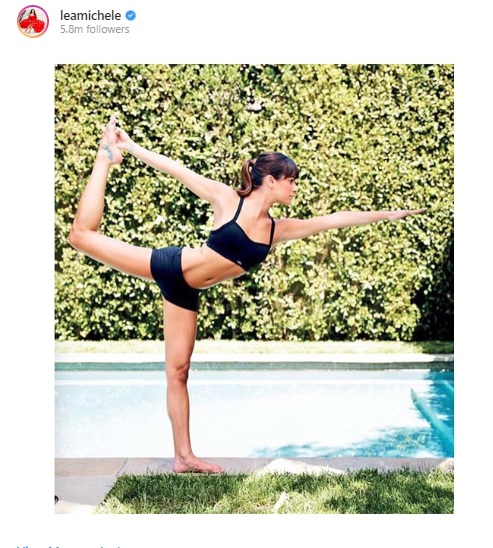 instagram/leamichele
Your body will naturally bend forward slightly, but try to keep it as upright as you can for a deeper stretch into the back. You can reach your free arm out in front of you for balance if you need it. This is another pose concentrating on a fixed point that can help your balance as well.
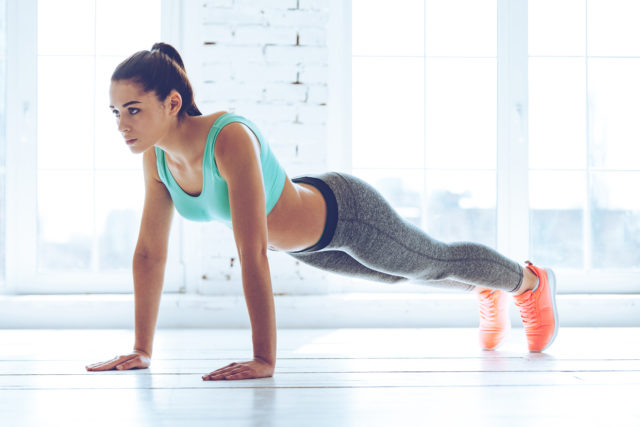
Low Plank
This is usually the next pose in a vinyasa flow, and it’s often referred to by its Sanskrit name, Chaturanga. From plank pose, bend your elbows and lower your body so that your elbows are fully bent. Your body should still be in a straight line, slightly off the floor. If you don’t have much upper body strength, you may struggle to do this pose correctly.
 shutterstock
You can adjust by putting your knees down, just as long as you keep your upper body working in the same way. You typically won’t stay in those poses for very long before moving to the next pose in the series.
Half Pigeon Pose
This pose is a deep hip opener that’s great for an end-of-class stretch. Start on your hands and knees, and then take your right knee and bring it to your right wrist. Gently set the front of your leg down on the floor so that your right foot is in line with your right knee, and stretch your left leg out straight behind you.
 youtube
Then, slowly bend forward at the waist. Some people will be flexible enough to reach the floor, while others may only be able to move a few inches. Breathe deeply into the stretch, keeping an awareness of your hip flexors.
Half Lord of the Fishes
This pleasantly seated twist pose is a gentle stretch for your back. Start by bending both knees, and then let one knee slide onto the ground with the foot close to your hip. Then, cross your other leg over, keeping the sole on the ground.
 instagram/victoriaBeckham
 Put your opposite elbow to your top knee and then gently twist your spine away from it. Put your back arm on the ground for more stability.
Plow Pose
This is a relaxing inverted pose that’s excellent for people who deal with back pain. Start by moving into a shoulder stand. Lay on the floor and raise your legs into the air. Gently peel your lower back and stomach off the floor, so you’re only on your shoulders and upper back, and then bend your elbows and use your hands to support your back. From there, move into plow pose by lowering your legs towards your head, bending at the hips.
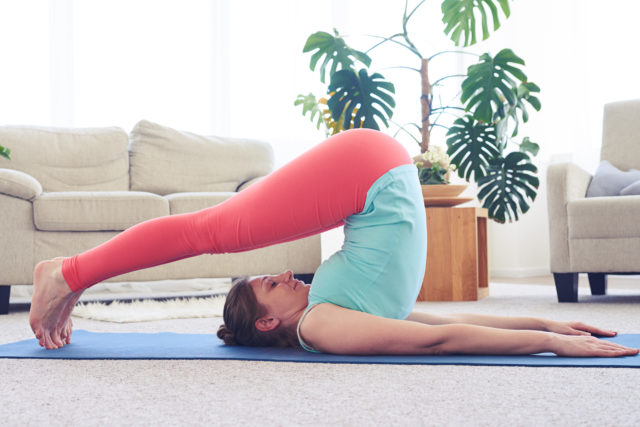 shutterstock
Your feet should eventually meet the floor several inches above your head. Be careful not to collapse in your back, and keep your legs straight and energized for a deep stretch. If you want, you can extend your arms away from your back and clasp your hands for an even deeper stretch.
Plank
In a vinyasa yoga class, you’ll likely move from a downward-facing dog into a plank position. From downward-facing dog, move your weight forward into your hands and lower your hips, so your body makes one long straight line.
 shutterstock
Keep your neck in a neutral position, so it isn’t strained forward or dropping down. Try to stack your shoulders over your elbows and wrists – if you’re hyperextended, you may need to bend your elbows slightly.
Child’s Pose
This is one of the most restorative poses in yoga practice, and it’s one that you can continue to come back to throughout a yoga class if you need a rest. To start, kneel with your toes touching and your knees slightly apart. Then, drop your hips back and lay your torso between your thighs.
 shutterstock
Stretch your arms out in front of you, or put them by your sides along your torso with your palms up. Breathe deeply and let your body relax.
Cat-Cow Pose
This pose is typically used to warm up the spine before moving into a downward-facing dog. Start on your hands and knees, taking care to align your wrists with your shoulders and your knees with your hips. Inhale as you lift your head and chest towards the ceiling, letting your stomach drop towards the mat. Then, exhale and round your back, gently tucking your head towards your chest.
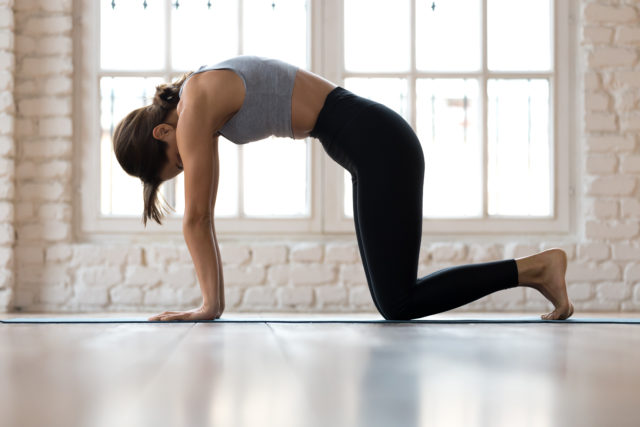 shutterstock
Slowly repeat this motion to warm up your spine. Some yoga teachers may even encourage you to add some hip and head circles to this pose to warm up even further.
Happy Baby Pose
This is another relaxing pose that you would usually take near the end of class. It’s a great way to open up your hips and get a nice deep stretch. Start by laying on your back and tucking your knees into your chest. Then, grab the outsides of each foot with your hand, and open your knees so they’re outside of your chest and up towards your armpits.
 instagram
Keep your feet flexed and align them over your knees to make a right angle. If you don’t quite have the flexibility to hold onto your feet, you can use a yoga strap to maintain the position.
Forward Fold
This pose will also stretch the backs of your legs, awakening the muscles for a deeper practice. Start in mountain pose and bend forward at the hips. You can bend your knees slightly to get your torso closer to your legs. Put your hands on the floor, or hold your elbows if you don’t have enough flexibility to reach the floor.
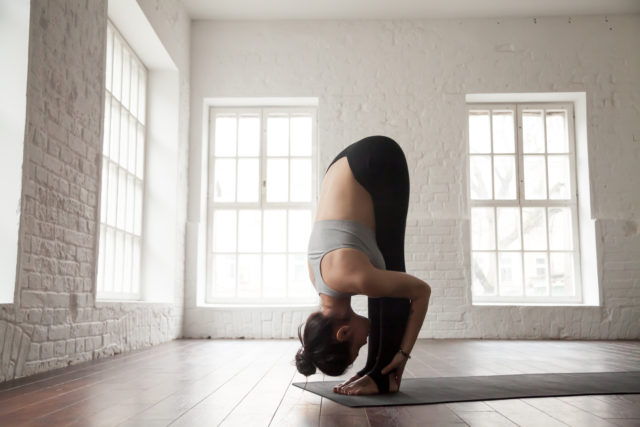 shutterstock
Lengthen through the spine and think about turning your thighs slightly inward to maintain good alignment.
Mountain Pose
This foundational standing pose is key for remaining grounded and strong throughout your practice. Start by standing with your toes together and your heels just slightly apart. Ground your body down through your feet as you reach your arms up overhead.
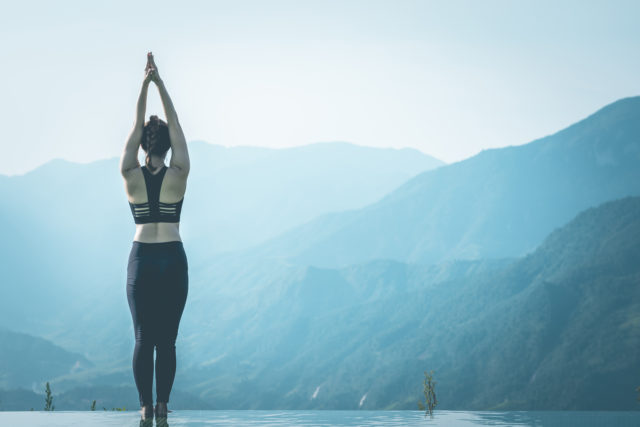 shutterstock
Think about engaging your core and gently pulling your hips down, so your body makes a straight line. Breathe deeply as you stay grounded into the pose. In some cases, your teacher may have you do this pose with your hands in prayer position or even down by your sides.
Triangle Pose
This pose starts in Warrior II, but moves into a deeper stretch through the legs and shoulders. From Warrior II, straighten your front leg and reach your front arm towards the ground. You can use a block for stability if you don’t quite have the flexibility to reach the ground. If you are flexible enough, you can put your hand on the floor or your shin.
Rotate your torso open to the side of the room and reach your top arm up towards the sky. Think about keeping your spine long in one straight line. You’ll feel a nice deep stretch through the legs and upper body. Be sure to engage your core for even more stability.
Crescent Lunge
Crescent lunge is an excellent pose for strengthening your thighs. Start by bringing one foot forward, so your feet are mat distance apart. Then, bend your front knee while you keep your back leg straight, and keep your back heel lifted off of the floor. Bend deeper into your front knee, so your thigh is parallel with the floor.
 shutterstock
Keep your hips squared to the front of the room so that they don’t twist open to either side. Extend your arms up towards the ceiling. You should feel a deep stretch in your hips.
Chair Pose
This is another pose that is excellent for toning the thighs. Start in mountain pose with your arms straight up and perpendicular to the floor. Bend your knees, trying to find a deep knee bend with your thighs parallel to the floor.
 shutterstock
The torso should stay straight and lean out over the legs slightly. However, you should think about pressing your weight into your heels for balance. If you’re struggling to keep the back straight, think about lengthening through the tailbone.
Boat Pose
This pose is excellent for strengthening the core. Start by sitting on the floor with your legs in front of you. Put your hands on the floor next to your hips and lean back slightly. Bend your knees and lift your legs off the floor. Your legs should be at a 45-degree angle with the floor, and your body should make an inverse triangle shape.
 shutterstock
Gently straighten your knees and extend your arms out in front of you for balance. You’ll need to deeply engage your core and your hip flexors, and keep your back as straight as you can. If you’re struggling to maintain your balance, you can keep your knees bent and hold onto the backs of your knees.
Garland Pose
This pose is a squat that provides a deep stretch through your hips and upper legs and helps increase mobility in the ankles. Start by squatting with your feet close together – they’ll probably naturally turn a bit outwards. Try to keep your heels on the floor. Open your thighs, so they’re positioned outside of your torso.
 shutterstock
Then, bring your hands to prayer position at heart center, and bend forward slightly so that your chest is in between your legs. Press your elbows into your knees to create some resistance.
Wild Thing
This dramatic and fun yoga pose will help you stretch through your torso while improving your arm strength and balance. Start in downward-facing dog and then transition into side plank pose, with your weight on one arm and your feet stacked on top of each other on an angle.
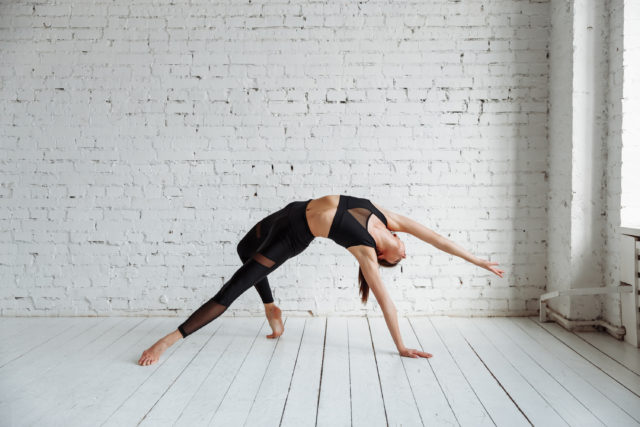 shutterstock
Then, lift your hips and step your top foot back on the ground, keeping your knee bent. Continue lifting your hips to create a more dramatic backbend, and reach your free arm back behind your head, sending your energy out that way.
Half Moon Pose
If you’re looking to build your leg and ankle strength while challenging your balance, this is a great pose for you. Start in triangle pose with your right leg forward. Bend your knee and gently push forward, lifting your left leg off the floor, so it is in line with your torso. Turn your left leg out, keeping the hip open, and lift your left arm into the air.
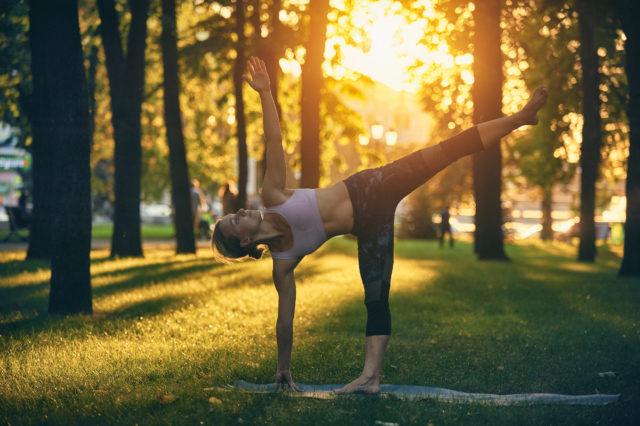 shutterstock
You may want to bend your knee slightly for more stability if you are hyperextended. You can also hold onto a block with your right hand for extra support and balance. Try to keep your entire body in one line, without letting your head or tailbone jut out or lean to the side.
Eagle Pose
This is a binding pose that is typically done in a standing position but can also be done supine. Start in mountain pose with a slight bend in your knees. Then, lift one leg, crossing it over the other, and hook the top of the foot behind your calf.
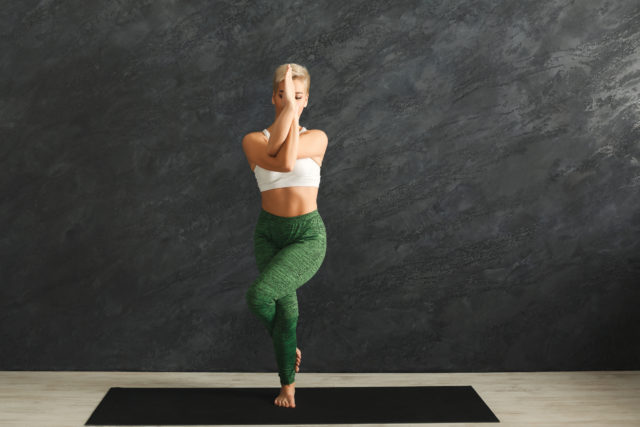 shutterstock
Stretch your arms straight forward, cross your arms, and bend your elbows. Then, cross your hands one more time for a double bind. Deepen the bend in your knee for further stability.
Bridge Pose
For this pose, start by lying on the floor with your knees bent and the soles of your feet on the floor. Then, push your hips up and off the floor, taking care to keep your knees and thighs parallel and not let them roll in or out.
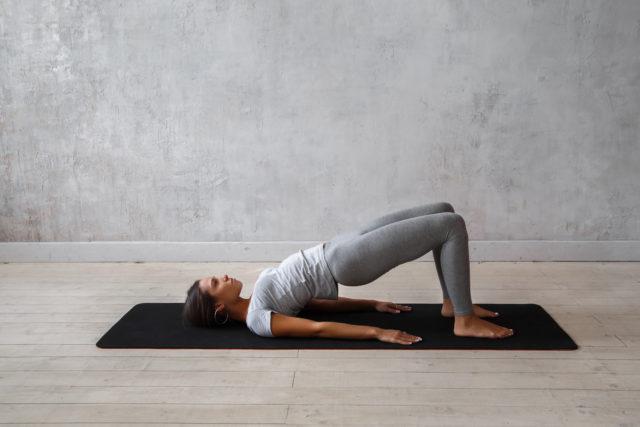 shutterstock
You can opt to keep your hands by your sides or clasp them underneath your hips. This pose is excellent for strengthening the lower back and inner thighs.
Half Frog Pose
This pose is both a gentle backbend and a quad stretch. Start by lying on your stomach with your forearms on the floor. Then, press your head and chest up for a gentle backbend. Bend one knee, pulling your foot back towards your hips.
 shutterstock
Reach back with your hand on the same side to grab the inside of the foot for gentle resistance. You may even be able to start to pull your foot away from your leg and towards the floor if you are particularly flexible. Repeat on the other side.
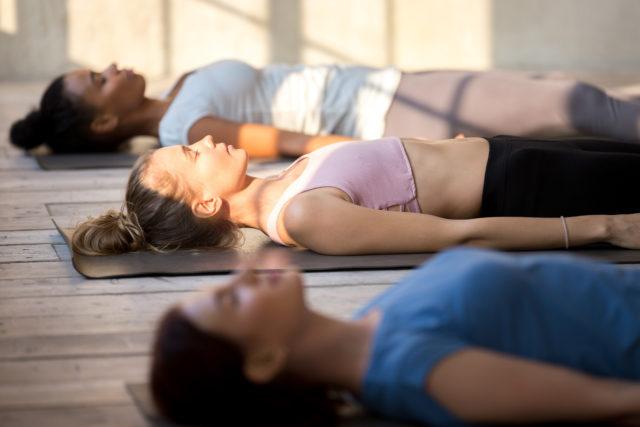
Corpse Pose
This is a meditative pose that is done at the end of a yoga class. It is often referred to by its Sanskrit name, Savasana.
 shutterstock
In corpse pose, lie on your back and close your eyes, focusing deeply on your breath. Let your muscles relax and focus on emptying your mind.